
While working on QuickBooks, users may encounter several software glitches. One of such glitches is the QuickBooks Error Code 6000 82. It usually occurs when the user tries to open a company file on QuickBooks. When this error takes place, the user cannot access the company files or data on any other system. This particular error code is encountered by users in a multiple-user environment.

Signs & Symptoms of QuickBooks Error Code 6000 82
There can be different types of signs and symptoms that could help the users to identify the QuickBooks error code 6000 82. These are:
- QuickBooks Error code 6000 82 is displayed on the screen.
- The system has crashed repeatedly with the same error message.
- The Windows is running sluggishly.
- QuickBooks or the system freezes repeatedly.
Causes of QuickBooks Error Codes 6000 82
The QuickBooks Error Code 6000 82 can pop up on your screen due to the presence of any corrupted or damaged files in QuickBooks. It reflects that the particular QuickBooks file cannot be traced on any other computer in the network. This might also take place in case the data source is damaged or if the software is encrypted. Let us take a look at the reasons why the QuickBooks Error Code 6000 82 can occur:
- The company file is corrupted or damaged.
- You have made changes in the database name or the source has been damaged.
- QuickBooks installed on your computer is encrypted.
- You are unable to find the company file on another computer.
- Your Windows defender firewall has been turned off.
- The network configuration is not appropriate.
- The file path used is not correct.
- Issues in accessing or hosting QuickBooks files.
Steps for Fix QuickBooks Error Code 6000 82
There are a few steps to follow if you want to resolve the issue of QuickBooks Error Code 6000 82:
Don’t Put Any Redundant Spaces After Company’s File Name And Before The Company File Extension
- Log out of the QuickBooks Desktop version on all your devices.
- Open folder of company file store.
- Right-click on the QuickBooks Company files and click on Rename from the available options.
- Put in a name for the file and then look for any spaces between the file extension and the name of the company and then remove them.
- Open or create a company file.
In case the problem is still not resolved and you are still unable to open any company files, you can perform the next solution.
Disable Hosting On Each And Every Computer That Has QuickBooks Desktop Version
For Single User Access:
- Go to Files and click on Utilities.
- After that, click on the Stop Hosting Multiple User access option.
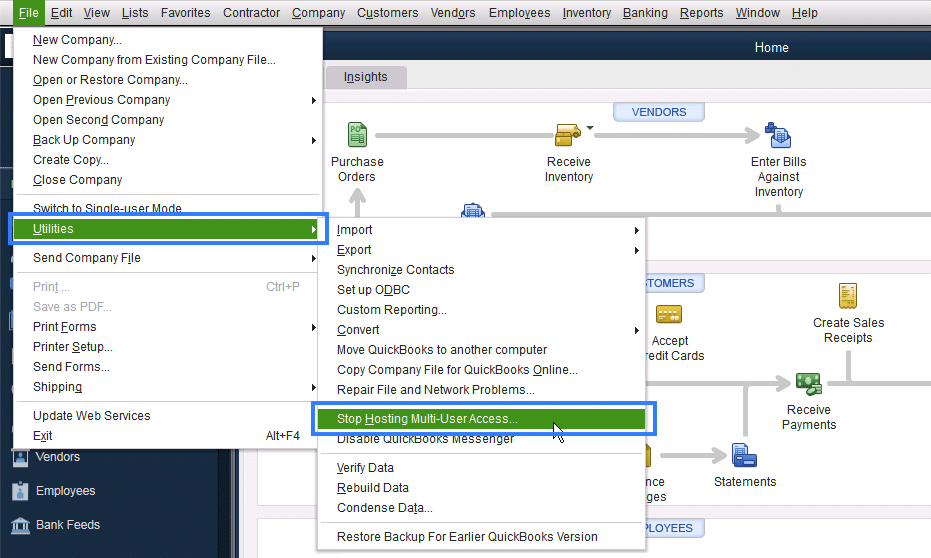
- Click onYesin the pop-up message for the optionStop Hosting Multiple Useraccess.
- Lastly, hit a click on Yes on the next pop-up box as well.
For Multi-User Access:
- Follow these steps on every computer that has QuickBooks Desktop installed on it.
- Open the No Company Open window and select the Open a Sample Company File option.

- Tap on the Utility option.

- Check for the Hosting Multi-User Access option displayed on the screen.

- ‘Stop Hosting Multiple User Access’ – tap on this section on all the computers showing this option.
- Next, try to open the company file.
Switch To The Mode Hosting Local And Remote Files For Multiple-User Access
- You must perform this troubleshooting step only if and when the previous solutions do not resolve the problem.
- You can then open QuickBooks and press the F2 button on your keyboard and then open the Product Information window.

- You need to check whether the Local Server Information towards the bottom of the window has Hosting set to local files or not. If not, then set it to Local Files.
- Click on the File menu and then select Switch to Multi-user Mode option.

- On a network system, open the company file and click on the F2 key on the keyboard for the Product Information window to open.
- Also, you need to check under the Local Server Information to make sure that the Hosting is set to local files.
Restart Windows
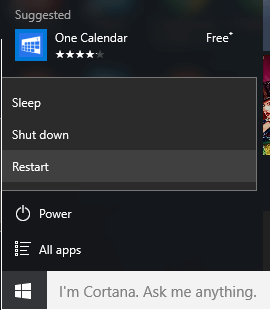
Restarting your windows system may most of the times fix QuickBooks Error Code 6000 82 as it might do away with the previous status of QuickBooks.
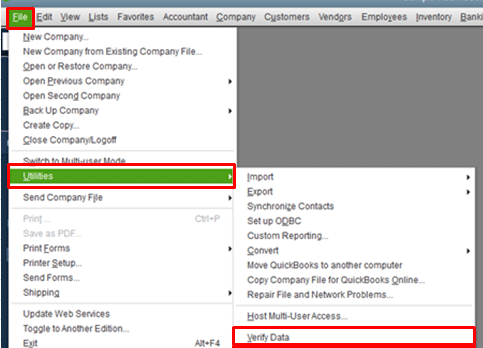
Perform Standard Data Troubleshooting On Your System
The QuickBooks Error Code 6000 82 might pop up on your screen due to some corrupted and damaged data of your company file. To resolve this issue, you would have to seek assistance from a professional expert. Fixing corrupted company files or data requires an in-depth knowledge of the software. You will have to run the rebuild utility and then also verify the utility to fix the data that is damaged. Therefore, it is highly advisable to contact an expert. The steps to be followed are:
- The initial step is to tap on the Utilities tab from the file menu and then click on the option of verify data.
- If and when the error message is seen stating that “QuickBooks detected no problem with the data“, then all you need to do is to hit a click on the OK tab.
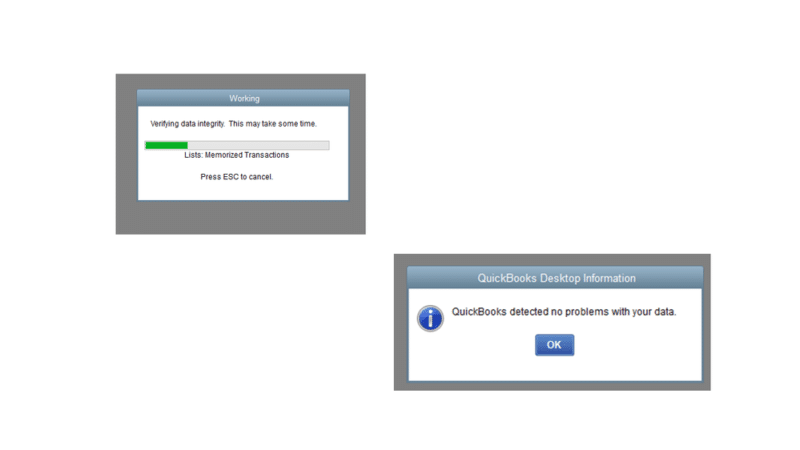
- You might then continue using the company file as usual.
- In case the verification finds any problems with the data, you might be prompted to rebuild now orview errors.
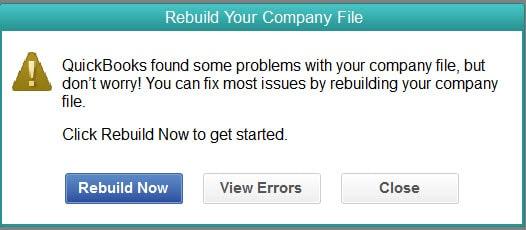
- You will have to click on close. Or you can perform the following steps:
- Spot the QBWin.log or QuickBooks.log files. From the tech help window, if you are working with a support agent, click on the send log files to the Intuit support. This will send the file to the repository that will enable the support agent to view the log files.
- In case you are working with a support agent, you will have to locate the most recent file for Begin Verify.
- If you are a Mac user, you need to scroll to the bottom for the most recent verified information.
- Search the line that contains the LVL_ERROR, look for it on QuickBooks learn and support. You might also see the data damage top LVL errors library.
- The errors within both the log files might not be the same but are presented on the same front.
Support For Issue
In case you are facing any kind of issues or have any kind of queries, feel free to reach out to our team for further guidance. We have an advanced technical support team available to provide you with complete technical and functional solution. Call us on our Quickbooks support number or you can get in touch with us via our Quickbooks Chat Support. We are also available through our Our Email Address support@usingpos.com