
It is good to note that invoices that you automatically set up can be scheduled to be sent daily, weekly, monthly, and even yearly, depending on your preference and agreement with your customers. Additionally, you can also set the start and end date of recurring payments.
QuickBooks is the name when accounting comes to anyone’s mind. It is the most trusted and most productive accounting software in the market. It always gives time to time many functions and many new tools and advanced add-ons to survive in the market and be ahead in accounting. Whether it is a small, medium business it has the reach to all the business, allows you to perform a variety of tasks including paying bills, tracking expenses, and creating automatic invoices for unpaid products and services.
These invoices are routinely created and sent to your customers, without you having to do any manual work or be at the computer to send these. In order to use this extremely helpful and time-saving feature, you have to ensure that your QuickBooks is configured in a way that allows you to setup automatic invoices in QuickBooks. It’s a pretty straightforward process but it helps you save a lot of time and money.
Keep in mind that automatic invoicing is only available for users that have the Essentials and Plus versions of QuickBooks and not Simple Start.
In this post, we will show you how you can create automatic invoices in QuickBooks and schedule them to be sent out to your customers and clients at preferred intervals.
What Are The Invoices?
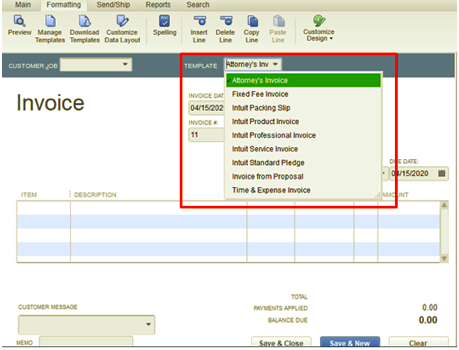
An invoice is one of the most important documents for everyone. You can say it is an accounting paper trail the details between two parties needs to do business with one another. Let’s go with simple information. As a transaction tool, an invoice is a bill for an account for the buyer and the business owner which indicates what is sold and for how much. They are used for account-based transactions between vendors and sellers who work.
Steps for Schedule Automatic Invoices in QuickBooks
QuickBooks enables you to pay the bills, automatic track payments, and create automatic invoices for the work. These invoices are automatically created and sent. Automatic invoice saves your time and time is money in business.
💠 Open the web browser
💠 Go to QuickBooks and sign in by using your User name and password
💠 At the top of the menu go to Edit >>Preferences to open the Preferences window
💠 Click on Invoice automation to view the automated settings
💠 Click the “create invoice and tell me about it” if you want to create the QuickBooks automatic invoices and inform you.
💠 You can also click” create invoices and don’t tell me” if you want to create the invoices but don’t want to hear from QuickBooks about the same
💠 Click “Any activity” daily, weekly, monthly, or yearly to select when to create the automatic invoices.
Total Time: 30 minutes
You Can Also Streamline Your Invoicing. There Are Several Different Things To Streamline Your Invoicing Some Steps.
Invoicing Schedule
For your customer, consider invoicing per month, also take care of your cash flow.
Invoicing Format
You can streamline everything for your business. You can also streamline everything on the invoice. Try to make the invoice simple, still, if your business is small or big it doesn’t matter.
Progressive Invoicing in QuickBooks Online
You need to turn on the progressive invoicing in your company, then while creating the invoice you will see the option to a percentage, fixed amount, or whatever. You can always change the same once it is created
Delayed Charges
If you have many items and you need to make the invoice later, use using delayed charges. Once you are ready to create an invoice these charges will show up on the screen
So you can see there are a lot of features in QuickBooks that you can use for your business and save your time and money.
Final Words:
The above-mentioned steps to set up and schedule automatic invoices in QuickBooks are fairly simple to follow through. However, if you face an unexpected problem or are unable to set up your invoices, you can get in touch with our expert helpline right away. Feel free to dial for any information or any help. QuickBooks experts are always available 24*7 to support you. Experts are polite, quick listeners, knowledgeable, trained, and professional so that they could understand the customer’s errors and issues quickly. You can also email at support@usingpos.com and soon one of the QuickBooks experts contact you with the solution.

💠Frequently Asked Questions
Q 1. How Can I Adjust Invoice Payment Terms In QuickBooks?
Ans: Invoice payment terms are, in simple terms, an understanding between you and your clients and customers relating to the frequency of payments i.e., the number of days between each invoice payment. There are two ways you can adjust the invoice payment terms for your clients.
Option 1: Set default payment terms for all your customers by going to the Gear icon on any of the pages > Choose Accounts and Settings/Company Settings > Sales > Press Pencil icon for Sales form content > make your preferred selections (“Net” refers to the number of days that you wish to keep between each of your payments). The preferred invoice terms will automatically be applied to all future invoices. Press Save and Done to finish.
Option 2: Set specific terms for specific invoices which you can do from the invoice itself by simply defining the payment term for the particular invoice. This way, the changes would be applicable only to this invoice – you will have to change the default from ‘Settings’


Q 2. Is There a Way to Manually Record Payments Against Invoices That Have Been Paid Either in Advance or Beyond the Due Dates?
Ans: Yes, of course, you can manually record payments made by your customers against invoices generated for them if they make a late payment or pay before the invoice is due. To record such payments, you have to:
💠 Press +New and choose to Receive Payment
💠 Select the name of the customer who made the payment from the Customer dropdown
💠 Select the payment method used by him to make the payment under the Payment Method dropdown
💠 Choose the account you put the received payment into from the Deposit dropdown
💠 Tick the checkbox for the invoice that you are updating the payment for from Outstanding Transactions
💠 If needed, enter the reference number and memo
💠 Finally, press Save and close
Q 3. Is there a Way to Record a Partial Payment For a Client?
Ans: Absolutely, yes. It is best to record every payment that you receive from each client, even if it’s only a part of the payment. To do so, you have the take the following steps:
💠 Hit +New and click Receive Payment
💠 Locate the name of the customer who made the payment from the Customer dropdown
💠 Choose the payment method used by him to make the payment under the Payment Method dropdown
💠 Click the account you put the received payment into from the Deposit dropdown
💠 Tick the checkbox for the invoice that you are updating the payment for from Outstanding Transactions
💠 Enter the amount that you have received against the Amount received field
If required, key in the reference number and memo
💠 Finally, press Save and close
Q 4. How Can i See the Remaining Balance for a Customer for whom i have Record Only a Partial Payment?
Ans: To see the pending balance for a customer, you can:
💠 Go to Reports
💠 Open Customer Balance Details report
💠 Choose Run Report
💠 Check the customer’s Open Balance